We’ve gone over how to hold the guitar, the strings, tuning, all the stuff, now it is finally time to start really playing the
Guitar. We are going to start out with chords. Let’s take a second just to describe what a
Chord really is. Technically speaking it is three different pitches played at the same time. You can play more than that, but technically that is what you need. On the guitar, what that usually means for us, is that three strings. Obviously you can strum as many as six, but that is basically what a chord is.
We are going to start out talking about the D chord. Or D major. But everybody just calls it the D chord. D chord is one of the most commonly played chords on guitar. It’s one of the ones that is easier to finger, so people love to use it. Let’s get into the details here. We are going to start by bringing up a chord diagram. [Shows the D major chord diagram on the screen]. On the screen here, you can see our chord diagram. Remember, you’ve got that
Nut up at the top here, that thick black line. The numbers at the top, those are your fingers, that you are going to use And we’ve got these three black dots - that is where we are going to press down. So, you’ll also notice you have two x’s on this chord, so we are not going to play the 6
th string, and we are not going to play the 5
th string. This chord only has 4 strings.
Let’s go through putting our fingers in the right place. We are going to start out with our pointer finger, that is usually the finger, that is the easiest to use. And then, the second finger, and by the end, the pinkie is the hardest one to control by itself. Pointer finger - on the diagram you can see that pointer finger goes on the 3
rd string at the 2
nd fret. So, I am going to get my pointer finger here, 3
rd string, 2
nd fret. Next, I am going to take my 2
nd finger, and put that on the 1
st string at the 2
nd Fret. So, you’ve got to skip that string. Here we go. And finally, I take my 3
rd finger, and I am going to put that on the 2
nd string , 3
rd fret. So, I’ve got my fingers in place. If you look at the diagram, you’ll notice you kind of have a triangle shape, and this can be a handy tool to help remember these chords.
Some people think to themselves: D chord - triangle. So, if you see chord diagram that reminds you of something, make a mental notice of it. Because that could actually be helpful. I’ve got my fingers in place on my D
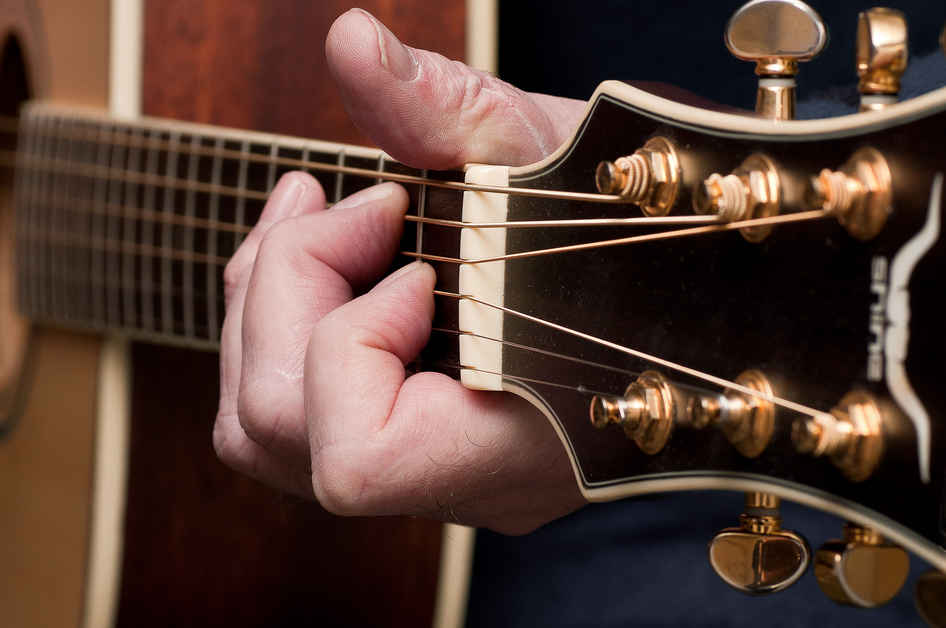
Chord. The couple of notes about technique. The basic idea here, remember, is that wrist is straight, that is what is going to enable your fingers to move most comfortably. As far as the placement of the thumb, if you either want to bend the thumb, or you want to collapse the whole hand onto the
Neck. A lot of times these create weird angles in the wrist. So, if your wrist is straight, the most natural place for your thumb, is with the pad of the thumb about three quarters up the way on the neck of the
Guitar here. For some people it is going to point right down the neck, for some people it will be more out of an angle. Again, try to keep the wrist straight. Fingers should be curled, you want to be right on your finger tip. If your left hand fingernails are bit long, like they are actually hitting the
Fret board, and preventing your finger from curling around, you’re going to want to trim those fingernails back a little bit. Have a good amount of bend in your fingers, you don’t want to be too bent, you don’t want to be too flat. So, just try to apply even pressure in all your fingers, not crazy too much pressure. But just enough to get the chord to sound.
And we are going to try to play this thing here. Align your pick on the 4
th string, and you’re just going to strum downwards. [Strums once]. One more time [Strums once]. And If I pluck each string [Plucks each string separately], they all ring. When you are starting out, something like this usually happens. [Plucks the strings, some are not ringing]. Or [Plucks the strings] one of the strings doesn’t want to ring. Just be patient with it, play with the placement of your fingers, see if you can find something that works. Usually we are pressing harder than we need to, and when you push really hard on the finger, it gets a bit wider. And then it might bump into the string that is next door. So, try not to press too hard.
But even if your
Chord has two out of four strings ringing, just keep working on it. Don’t get too frustrated. And start with this exercise. When we did the chord, I had you do each finger, but when you do it in practice, you are going to want to try to do all three at once. The way to build that is combinations of fingers. For example, I am going to take finger one and two, and I am going to see if I can put them down together at the same time. Then I’ll release them, put them back. This help to build the muscle memory. When I feel like, Ok, I can control them, and get them where they need to go, then maybe I will add a third finger. And after that feels comfortable, then I’ll see if I can do all three at the same time. Again, this is something that takes time.
So, just start practicing this D chord. D
Chord is super common, you are going to see it a million times here. So, this is a really good one to practice, and again, we are learning to use our chord diagrams. Once you feel that you’ve made some progress, and you are really comfortable reading the diagram, and getting this chord down, might you try the next chord in the next lesson.




 Open D Major Chord DiagramFirst Finger (1): 3rd String (G) > 2nd Fret
 Open D Major ChordKeep your wrist straight.