Welcome back. In our last lesson we learned a couple of new chords. We learned the A chord, E chord, and D
Chord. So, let’s take the second just to talk about those. One thing, that they all have in common, is that you are taking a couple of fingers and clustering them together, you are pushing down on few different strings, and then you’ve got some
Open Strings, also ringing. Like an E chord, for example [Strums once]. That is what we call an open chord. An open chord is basically when you press down on couple of strings, and you also have some other strings that are open strings, and they all ring together.
Another thing that is common to all three of those chords is that they are major chords, open major chords. What is a major chord? A major chord is basically a happy chord [Plays major chord]. It is kind of very common sounding, comparing to minor chord, that is very [Plays minor chord] like sad sounding. Or like a funky chord [Plays funky chord]. It can be like a metal chord [Plays metal chord]. Every chord has got its own characteristic. So, open major chords, they are basically building block chords. Sometimes we call them campfire chords. You are sitting around the fire, singing and... [Strums different chords]. Or what not.
So, we are going to learn couple more those kinds of chords today, few more open major chords. Let’s start out with our C
Chord. [Shows the C chord diagram on the screen] On the diagram, you’ll notice that we have one x, and it is on the 6
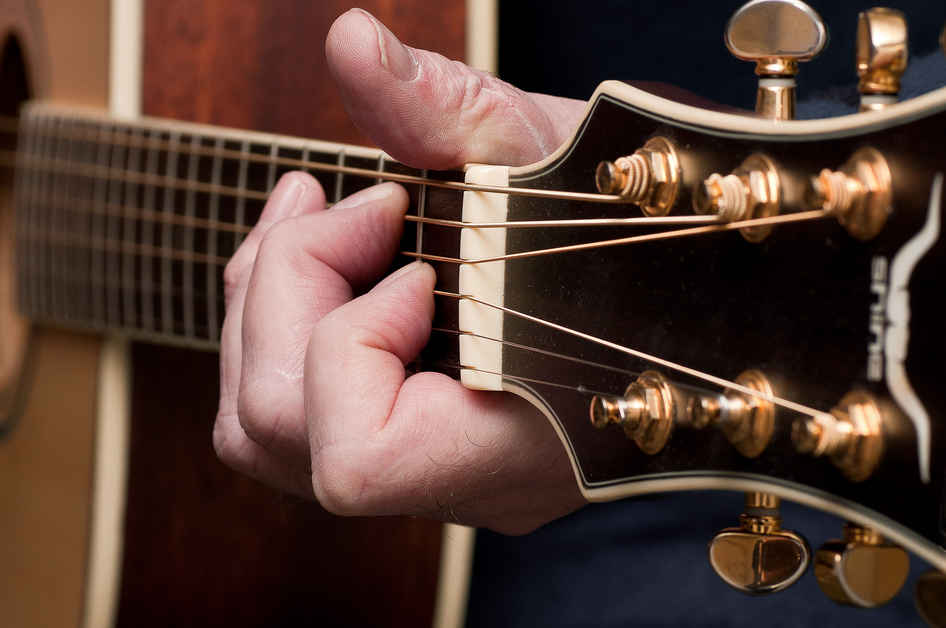
th string, so this chord is just going to be the bottom five strings. Let’s start out with our pointer finger. Before we get into this, remember the good technique point. You want to remain on the thumb pad, you do not want to bend the tip. And we want to create a little space underneath the
Neck. Space between our hand and the neck in order to get the finger tips nice and high on the tip here. Really curl those fingers. Let’s start out with our pointer finger. 2
nd string, 1
st fret. Remember to get it all the way up to the
Fret here. Now we are going to put our 2
nd finger on the 4
th string, so you are going to skip a string here. This is kind of new. So, skip that 3
rd string, go to the 4
th. And now our last finger is the 3
rd finger, that is going to go on the 5
th string , 3
rd fret. We’ve got like a diagonal shape going on here. So, we are just going to strum the bottom 5 strings [Strums once], and there we go, that is our C
Chord. If your fingertips are not really high, and they are sort of little flatter, you might get something like this [Plucks the strings, they do not ring]. Totally frustrating, but very common. Just try to remember to get those fingers a little bit more on the tips, that will sort of help them get out of the way of the various other strings. And everything can ring. That is our C chord. In that we had that little skip of the string, that can be a little challenging.
We are going to learn two more chords, that have other challenges. First of, we are going to use the pinkie. So we haven’t used the pinkie yet. And we are going to learn it on the G chord. [Shows the G chord diagram on the screen] If you look at the diagram, for our G chord, it’s another open major chord. We’ve got two notes on the 2
nd and 1
st string that are right next to each other. They are on the 3
rd fret. Let us actually start with those. So, you could put your pinkie down first, you could put your 3
rd finger after it. Although it kind of actually helps to use them together. You can kind of squash them together, it gives your pinkie a little bit more strength. We are going to go pinkie and 3
rd finger, on the 1
st string, and the 2
nd string. Both of them at the 3
rd Fret. So, we got those down. And now I have a big stretch, so this is the challenge for this chord. Let’s start with the 2
nd finger, it is going to go also on the 3
rd fret, which means you kind of have to sneak it by this 3
rd finger. 2
nd finger is reaching all the way to the 6
th string, and 3
rd fret. And now I am going to take my pointer finger, and put it on the 5
th string, 2
nd fret. We are going to strum all six strings. [Strums few times]. There we go. Now, interesting note about this one, it is kind of common to sort of bend some rules here. Look what is going on with my thumb. I am not on the pad here in the traditional way, and the reason is, if you are on the pad, sometimes it creates a really big bend in the wrist, and as we mentioned in the basic technique of
Guitar playing, big bends in the wrist are generally not a good thing. They don’t feel very good. Sometimes you can kind of slip the thumb up a little bit here, and that will straighten out the wrist. You have to be careful though, that you don’t result in like fingers all laying flat, and you get a bunch of muted strings. So that is our G chord.
Now, we are going to learn our F
Chord. The F chord starts out a little bit similar to the C chord, so [Shows the F chord diagram on the screen] you’ll see on the diagram here, we’ve got x’s on the 6
th string, and the 1
st string. On the outsides of the chord. And then we’ve got notes on strings: 2, 3, 4 and 5. So let’s start with our pointer finger on the 2
nd string, 1
st fret. Then I am going to go to the 3
rd string, 2
nd fret with the second finger. Like a little diagonal thing again. Again I want to take the 3
rd and the 4
th finger, and I want to try and use them together. And they are going to go next to one another, on the 5
th string, and the 4
th string, both at the 3
rd Fret. If I just strum everything, without even worrying about the excess [Strums few times]. It is a little bit of messy sounding. We need to observe the excess. The 6
th string, you just try to avoid that. But the 1
st string - we are going to learn a technique here to deal with this. Instead of trying to use your pick and avoid that string, we are going to mute it with the left hand. Here is what we are going to do. Instead of playing your pointer finger super high on the tip with the finger really, really bent, just pull back gently until you can feel the first string bumping into the flesh there. It shouldn’t affect the note that you are fretting. Here is that note on the 2
nd string [Plucks the string]. Everything is fine, but the first string [Plucks the string], there is no sound. That is the mute. When we put the other fingers in, you’ve got this muted string on the bottom. That is going to take a little bit of extra time, and practice. Actually, if you can’t get the mute, and you get that bottom string ringing open [Strums once], it actually sounds kind of pretty. Technically it is not really a F chord anymore, but you know, don’t let it drive you crazy, if you can’t get it for now. Because, with practice it will come.
Now, we’ve gone over our A, E and D
Chord. Those were the three major chords from the previous lesson. And then we just learned the C, the F and the G. So, we’ve got six open major chords to work from here. Just kind of try mixing them up, practicing, switching from one to the other, and, you know, have fun with it. Be patient. The switching, that is always the hardest part, Always the hardest part. So, just accept it. Sometimes, if you want to play like C to D, it’s going to take a second to get your fingers in. But that is ok. It is a little bit more important that when you work on the chords, you try to get each chord to sound nice. That is a little bit more important, than trying to switch as fast as you can. So have fun, have some patience, and it is going to come together.
We’ll see you in the next lesson.




 Open C Major Chord Diagram 1st Finger (pointer): 2nd String (B) > 1st Fret
 Open G Major Chord Diagram4th Finger (pinky): 1st String (e) > 3rd Fret
 Open F Major Chord4th Finger (pinky): 2nd String > 1st Fret
 Muting a Guitar StringUsing one of your fingers to deaden the vibration made when you strum a string. This is done on the F-Major chord on the 1st string to prevent that string from ringing out.